Wednesday, January 28, 2009

Saving $$$ 1996 Style!


I have this book from 1996 that my MIL bought for me at a yard sale about six or seven years ago. The prices are so funny to read! Pillsbury refrigerator biscuits go on sale for $.25! Hahaha! Ground beef is $.99 per lb. Expensive cereal is $3 a box. But the concepts are still very valid!

I'm re-reading it and have found some GREAT recipes!

Right now I'm making homemade granola. I'll post the recipe after I decide if I like it. The one I'm excited about is a cream of ___ soup mix.

Cream of ____ Soup Mix
2 cups instant milk
3/4 cup cornstarch
1/4 cup instant chicken bouillon
1 tsp onion powder
1/2 tsp dried thyme
1/2 tsp dried basil
1/4 tsp pepper

Combine these in an air tight container.

To use for soup, combine 1/3 cup mix and 1-1/2 cups water. Bring to a boil stirring often. Add a vegetable for more flavor - diced celery, mushrooms or broccoli.

To use for any recipe calling for a can of cream of mushroom, chicken, or celery soup use 1/3 cup mix and 1-1/4 cup of water. Boil a few minutes & stir often.
Photobucket

Tuesday, January 27, 2009

Potty training time

Already? Ava will be 2 at the end of Feb. She's just barely in a size 24 months. Her car seat is rear facing - she weighs 22 lbs soaking wet. But she's showing potty training signs.

Today marks day 2 of training.

When Emma was this age she was showing signs of being ready, so I bought some great vinyl training pants. It was my first intro to cloth diapers. Who knew I'd like them? I bought them because I hold the opinion that a diaper keeps you dry and you don't feel uncomfortable. And if you're not uncomfortable, why bother using the potty? (This is what I think two year olds are thinking) It was a great clearance sale - they were less than $2 or $3 each. A few have had a mishap or two over the years of being borrowed & loaned out. I learned the hard way they don't like dryers - they just melt holes in the vinyl.

So I've gathered them back from my SIL and will start using them again. Sadly, a good number of them are a 3T! So I started looking online. The ones I want - now that I'm a BTDT (been there done that) mom - have snaps or velcro on the sides for easy emergency removal. They're also quite spendy. PUL isn't cheap. You can't buy in at Joanne's. We're talking special order commercial found on the internet fabric.

But I started thinking and then I started sewing! I made my own cloth trainers! And they're waterproof too!


I used a pair of panties for a pattern and made it a bit larger. I traced them in one piece so it sort of looks like a diaper shape. Then I wondered why I didn't just trace one of my very nice cloth diapers? I cut one layer for the outside - I chose a cute green flannel. One layer for the inside - off white polar fleece. I would have prefered a microfiber cloth, like the dust cloths you buy - but wasn't fond using it on my first pair of trainers.

My waterproof lining is. . . (get this). . . grocery sacks! I saw a tutorial for this on Etsy. You cut your grocery sacks and lay them out flat. I found the easiest thing is to cut off the handles and the bottom, then cut down one side. I came out with a piece about 3 feet long. You layer them about 5 or so bags thick and slowly melt with your iron. You need to have parchement paper sandwiching the bottom & top layer, so you don't melt onto the iron or the ironing board. If you need more waterproof fabric you melt a piece, then slip it about an inch into the next sandwiched bit of plastic, and melt them all together.


I actually cut the plastic liner first, then the fleece & flannel. I stitched right sides together everywhere but the back. Added some elastic that I stretched as I stitched on the leg openings. Flipped it right side out. Added more elastic on the back and stitched that all closed. Added my velcro & there you go!

They crinkle a bit - its not a quiet thing to wear. But they work! Its not a diaper, it won't hold a lot of liquid for very long, but it keeps a puddle from forming on the floor! I don't think you can dry in the dryer - the plastic liner is likely to melt. My next pair will have a bit more room on the sides for the tabs but overall I think they're great! And it saved me $14 a pair!

You can see the finished trainer on top of an extra layer of my plastic fabric. Be sure to cut larger than you want the finished product - look at how much smaller this turned out in the end.


Love the bag melting bit? Here's more on what to do with your new found fabric! Etsy ideas


Wednesday, January 21, 2009

Save $$$ on dishwasher soap

So this year for us is all about spending less $$$ and saving more. I'm trying out new ways to be frugal & searching online for this good info.

Dishwashing Soap for about 8 cents per load
  • 1 Tablespoon Borax (76 oz sold for $5 at Ace)
  • 1 Tablespoon baking soda (128 oz for $13 online - it may be less at Costco where I bought a big bag)

Mix the Borax and baking soda together. Then, add to your dishwasher's detergent compartment, and run as usual. I like to mix up a big batch & fill an old Costco soap container.

Interesting facts:

Borax and baking soda are both natural disinfectants and mild abrasives – just what you need to blast away stuck on food and germs. In fact, you may be interested to learn that Borax is a common ingredient in many commercial detergents.

Why bother?

  • its inexpensive
  • there are no harsh chemicals
  • it does not emit chlorine gas like other commercial detergents
  • it is an effective sanitizer
  • it is an effective stain remover
  • its an effective water softener
  • and its environmentally-friendly (phosphate-free)
  • You actually use a lot less of this than the commercial stuff
Be sure to keep this away from kids & pets just like any other cleaner. I also marked the 2T line on my old scoop so I know I'm not using too much. I've been doing this for a month & have only once had to re-wash my dishes. (I'd loaded them funny & they just didn't get clean)

There are lots of places I may have found this info. . . But I'm pretty sure I read it at TipNut

Now head off to RocksInMyDryer for more Works for Me Wed tips!


Tuesday, January 20, 2009

Photoshop Success!

I've been trying to make a watermark for my photos. I had someone send me a photo of a garment she wanted duplicated with some major modifications. I later realized what site that pic had come from. It got me thinking that lots of people never think about copyrighted stuff, and I don't want my designs being copied (neither does anyone else). . . So I intend to start marking my designs.


Here's my photo with the watermark. I don't know that I can explain this well enough for you to duplicate. Google define brush 6.0 (or whatever photoshop program you're running). I finally figured out that in 6.0 you can't have a custom brush larger than 999 pixels. Whew. That only took me 2 days to figure out!

Basically - the short version is you create a photoshop file of whatever you want the brush to be (smaller than 999 x 999). Go Edit to Define Brush, name it and you're done. That sounds overly simple but it was really easy - once I figured out the size bit!

Here are a few links I used to help me Bitbox DaniDraws Also search online for free brushes - but remember that thing I said about copywrights - don't claim them for your own if they're not and don't try to sell what isn't yours.

Sunday, January 18, 2009

Blog Buttons

You know those cute little blog buttons everyone seems to have? Here's how to make one - follow this link

I don't do well following directions & got distracted part way through. So I did mine differently - I made my picture in Photoshop and saved it. Then on Blogspot, in the Layout section I added a gadget - a picture. I uploaded the picture and put my blog address as the link. I added the directions in my comments. I hope it works!

Okay - I'm back. It does not work. I'll be working on it for a bit. Maybe tomorrow I'll figure it out.

Tuesday, January 13, 2009

Saving $$$ making bread


So we know that baking at home can save money but I have troubles figuring it all out. You take the cost of your flour, decide how much it is an ounce, how many ounces you use. . . blah, blah, blah. It makes my head spin.

Poking around on the King Arthur site, I found this is figured for you at the end of each recipe!!

Here's white sandwich bread. Ignore the fancy name. They need you to use a special pan but also said you can use a regular pan & cover with a cookie sheet weighted with a brick.
Buy vs. Bake

Buy: Pepperidge Farm Very Thin White Bread, 22¢/ounce

Bake at home: Pain de Mie, 8¢/ounce


They also did the same for a cheese cracker similar to a Cheez-It. Mmmmmm. Plus look at the difference in ingredients!

Buy vs. Bake

Buy: Sunshine Cheez-It Crackers, 33¢/ounce

Ingredients: Enriched Flour, Soybean and Palm Oil with TBHQ for Freshness, Skim Milk Cheese, Salt, Contains Two Percent or Less of Paprika, Yeast, Paprika Oleoresin for Color, Soy Lecithin.

Bake at home: Vermont Cheese Crackers, 24¢/ounce

Ingredients: King Arthur Flour, Vermont cheddar cheese, yeast, salt, baking powder, vegetable shortening.


Come see Rocks in my Dryer for more Works for Me Wednesday tips!


Sourdough Starter

I've gotten my sourdough starter going again. I bought a great crock to grow it in & a starter. Then something happened with the starter & I quit. For a good 6 months. But I've got a new one & I made a bread last night!

My starter - before & after replenishing


Dried Yeast Starter

1 pkg active dried yeast
2 cups flour (unbleached white is my fav)
1 1/2 cups warm water
1 Tbs honey

Mix everything together in a non metal container. This will double or even triple so be sure you have room for it. I use a crock, but you can use a canning jar or a bowl. Cover loosely & let stand on the counter for a day or two. You'll see bubbling happen within the first 10 minutes, but let this wait for a few days to get 'sour.'

Feeding/Replenishing your starter
You need to put in about as much as you take out. There's no exact measurement to this - you just need to experiment. I used 1 cup starter, so I replenished with 1 cup flour & 3/4 cup water.

There's some great info here at KingArthurFlour. Its not where I bought my crock - if I remember I'll put the link in.

Sourdough White Sandwich Bread
1 cup starter
1 1/4 cups white flour (unbleached)
1 cup warm water
1 1/2 cups milk
2 Tbs honey
2 tsp salt
2 Tbs butter
6 1/2 cups flour

Mix the first 3 ingredients & let stand 10 to 24 hours.
When you're ready to bake, heat the milk, honey, salt & butter. Cool to lukewarm.
Add cooled mixture to sourdough mixture & beat in enough flour to make a dough you can handle. Turn out onto a floured board and let rest 15 to 20 minutes. Knead until smooth & elastic. Don't skimp on kneading. *I used my KitchenAid with the dough attachment to knead & then hand kneaded for just 3 minutes or so.

After kneading, place in a greased bowl, spritz the top with cooking spray & cover with a damp towel. Place in a warm location & let double. Punch dough down & let rise again. (Each may take 2 hrs to rise) Knead dough into shape you desire & put in baking pan - I've been using my stoneware (Brad ordered these in at Hometown for anyone in Yakima!) & it is fab! You should have 2-3 loaves. Dough should fill each pan about 1/2 way. Cover with a damp cloth & let rise again.

Bake at 375 for 45 minutes.

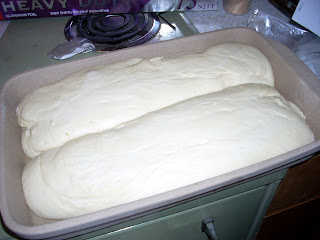
My dough - before baking but after rising. . . . and after baking.

Sunday, January 11, 2009

Serious Savings!

In case you didn't know, Kmart is doubling coupons this week!

Here's what I bought

Kmart
Spend Total
$76.28
Coupon Total
$34.9
Grand Total
$41.38
% Savings
46%
Item Price

Amount paid Coupon $$ Amount
Dove $5.29
$3.29 $2.00
Olay $4.49
$2.49 $2.00
Soft Soap $1.29
$0.59 $0.70
Mailing Tape $1.79
-$0.21 $2.00
Colgate $3.00
$2.00 $1.00
Colgate $3.00
$2.00 $1.00
Colgate $3.00
$2.00 $1.00
Kids Colgate $1.99
$0.49 $1.50
Kotex 22 ct $1.29
-$0.21 $1.50
Head & Shoulders $5.49
$3.49 $2.00
Blistex $1.29
$0.79 $0.50
Suave Salon $1.67
-$0.33 $2.00
Suave Salon $1.67
-$0.33 $2.00
OB Tampons $5.50
$3.50 $2.00
J&J bar soap $0.99
-$1.01 $2.00
tee shirts 6 pack $6.00
$5.00 $1.00
kleenex lotion big $1.67
$0.87 $0.80
kleenex lotion big $1.67
$0.87 $0.80
pace salsa 2jars $4.00
$2.00 $2.00
NV granola bars $2.99
$1.99 $1.00
NV granola bars $2.99
$1.99 $1.00
Welch white grape $4.49
$2.49 $2.00
Welch white grape $4.49
$2.49 $2.00
Celestial Seaons tea $2.79
$1.69 $1.10


Yes, that's right. . . I have 5 items that were FREE!!! What a deal! I don't think I've ever done that before in my life. And to think of all the years I never once used a coupon.

I found some great Excel files at Mommy Snacks and I've modified them a bit to suit what I'd like them to say. I'm going to start budgeting better this year! And save some serious $$$ while I'm at it.

Wednesday, January 7, 2009

Bread!! Or should I say Pizza!!

I've been baking - I'm really into baking breads right now. So much so, that as the Creative Activities Director of my MOPS group I have a demonstration day coming up where I'll have stations & we teach the moms to make bread. Interested in coming? Follow this link to First Pres Yakima where you'll find the director's phone number. Just give her a call - we'd love to have you!

My friend Laura pointed out there is nothing as satisfying as making your own bread. I much agree. My favorite part is proofing the yeast! Warm water, yeast & sugar. . . and then *poof * it all starts foaming & growing!

Here's a recipe to get you started. When we made pizza the other night we did one dessert pizza. I topped it with butter, a sprinkling of brown sugar & cinnamon. It was beyond fabulous! I had every intention of making a dip/frosting out of milk & powdered sugar but we didn't get that far.

Here's before baking the dessert pizza. . . .

And after baking. . . mmmmmm


Pizza Dough - Recipe from my Grandma Norma Hilmes
1 cup warm water ( 120-130°)
1 pkg yeast
1 tsp sugar

Dissolve this in a bowl. Wait 5 minutes for the yeast to foam & grow. If it didn't you need to start over. Your water might have been too hot or too cold. Or maybe your yeast was old. Doesn't matter - just try again.

2 Tbs veg oil
3 1/2 cups flour
2 tsp salt

To the yeast mixture add: veg oil, salt & 2 cups flour. Mix. Stir in remaining flour and kneed until smooth.

Grease your bowl with cooking spray - add the dough & spray the top of the dough. Cover the bowl with a damp towel & put in a warm spot. Let rise until doubled - about 45 minutes.

Punch down dough and let rest 10 minutes. Divide in half. Roll on floured surface as thick or as thin as you'd like. Transfer onto your baking sheet and add your toppings. Bake at 400° for 15-20 minutes.


I was listening to a tipsaving podcast that said you should add the sauce last. The idea was roll out the dough, add the toppings & cheese, add the sauce & add a bit more cheese - then put this all in the freezer. . . Frozen pizza! I haven't tried it but if you do, let me know how it works out.